
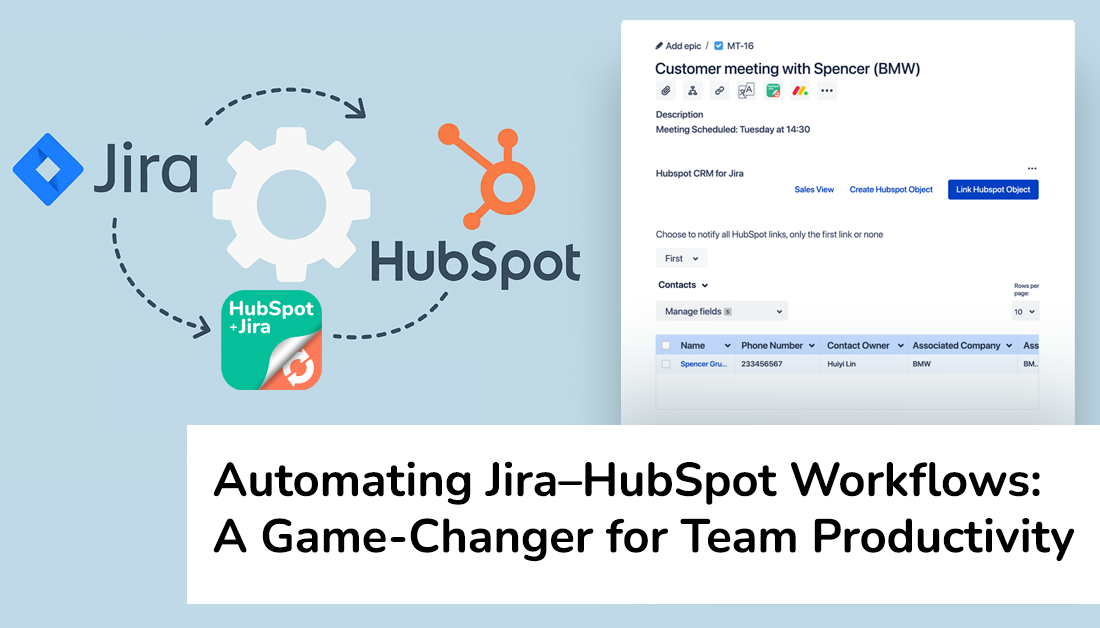
In today’s fast-paced work environment, teams rely on a myriad of tools – from issue trackers like Jira to CRMs like HubSpot – to get the job done. Manually keeping these systems in sync can be tedious and error-prone. That’s why automating workflows between Jira Cloud / Jira Service Management and HubSpot has become so important. By using the HubSpot for Jira app to connect these platforms, organizations can give all teams access to up-to-date customer and project information, with Jira and HubSpot teams “automatically working in harmony” for ongoing cross-team collaboration.
In this article, we’ll explore the benefits of this automation, the new features available to Jira-HubSpot integration users, how the automation works, and how easy it is to set up – all in a professional yet approachable way.
Benefits of Automating Your Jira-HubSpot Workflow
Integrating and automating workflows between Jira and HubSpot isn’t just about convenience – it delivers tangible benefits that can transform the way your teams work. Here are some key advantages:
-
Improved Efficiency and Accuracy: Automation “enhances efficiency, reduces errors, and frees human resources for more strategic tasks”. Repetitive work (like updating issues or records in two places) gets handled instantly by rules instead of people. In fact, more than half of teams using Jira’s automation report saving over six hours per month, and 87% say it helps them scale their work effectively. By offloading routine updates to an automated workflow, your team can focus on high-value activities rather than data entry or double-checking for mistakes.
-
Streamlined Cross-Team Collaboration: When your support, product, and sales teams all have visibility into the same information, collaboration becomes seamless. Connecting HubSpot and Jira means that both sides stay in the loop on each other’s work. Jira and HubSpot users can essentially work “in harmony, creating ongoing cross-collaboration” between departments. For example, if a support agent links a Jira ticket to a HubSpot company record, the sales team can immediately see the status of that issue in HubSpot without sending a single email. This breaks down silos and ensures everyone is working with the same context.
-
Better Data Synchronization & Single Source of Truth: An automated integration keeps customer and project data in sync across systems in real time. Changes in HubSpot (like an updated phone number or deal status) can be reflected on the linked Jira issue, and vice versa. This creates a single source of truth for customer-related data across teams. Teams no longer need to copy-paste information or ask each other for the latest updates – the integration ensures that “everyone is kept in the loop with the right kind of information” at all times. Not only does this save time, it also means that decisions are based on consistent, up-to-date data, whether you’re looking at it from Jira or from HubSpot.
In short, automation drives efficiency and consistency. It eliminates the tedious manual work of updating two systems and significantly reduces the risk of something falling through the cracks. The result is faster issue resolution, more informed decision-making, and a smoother experience for both employees and customers.
New Automation Features in HubSpot for Jira
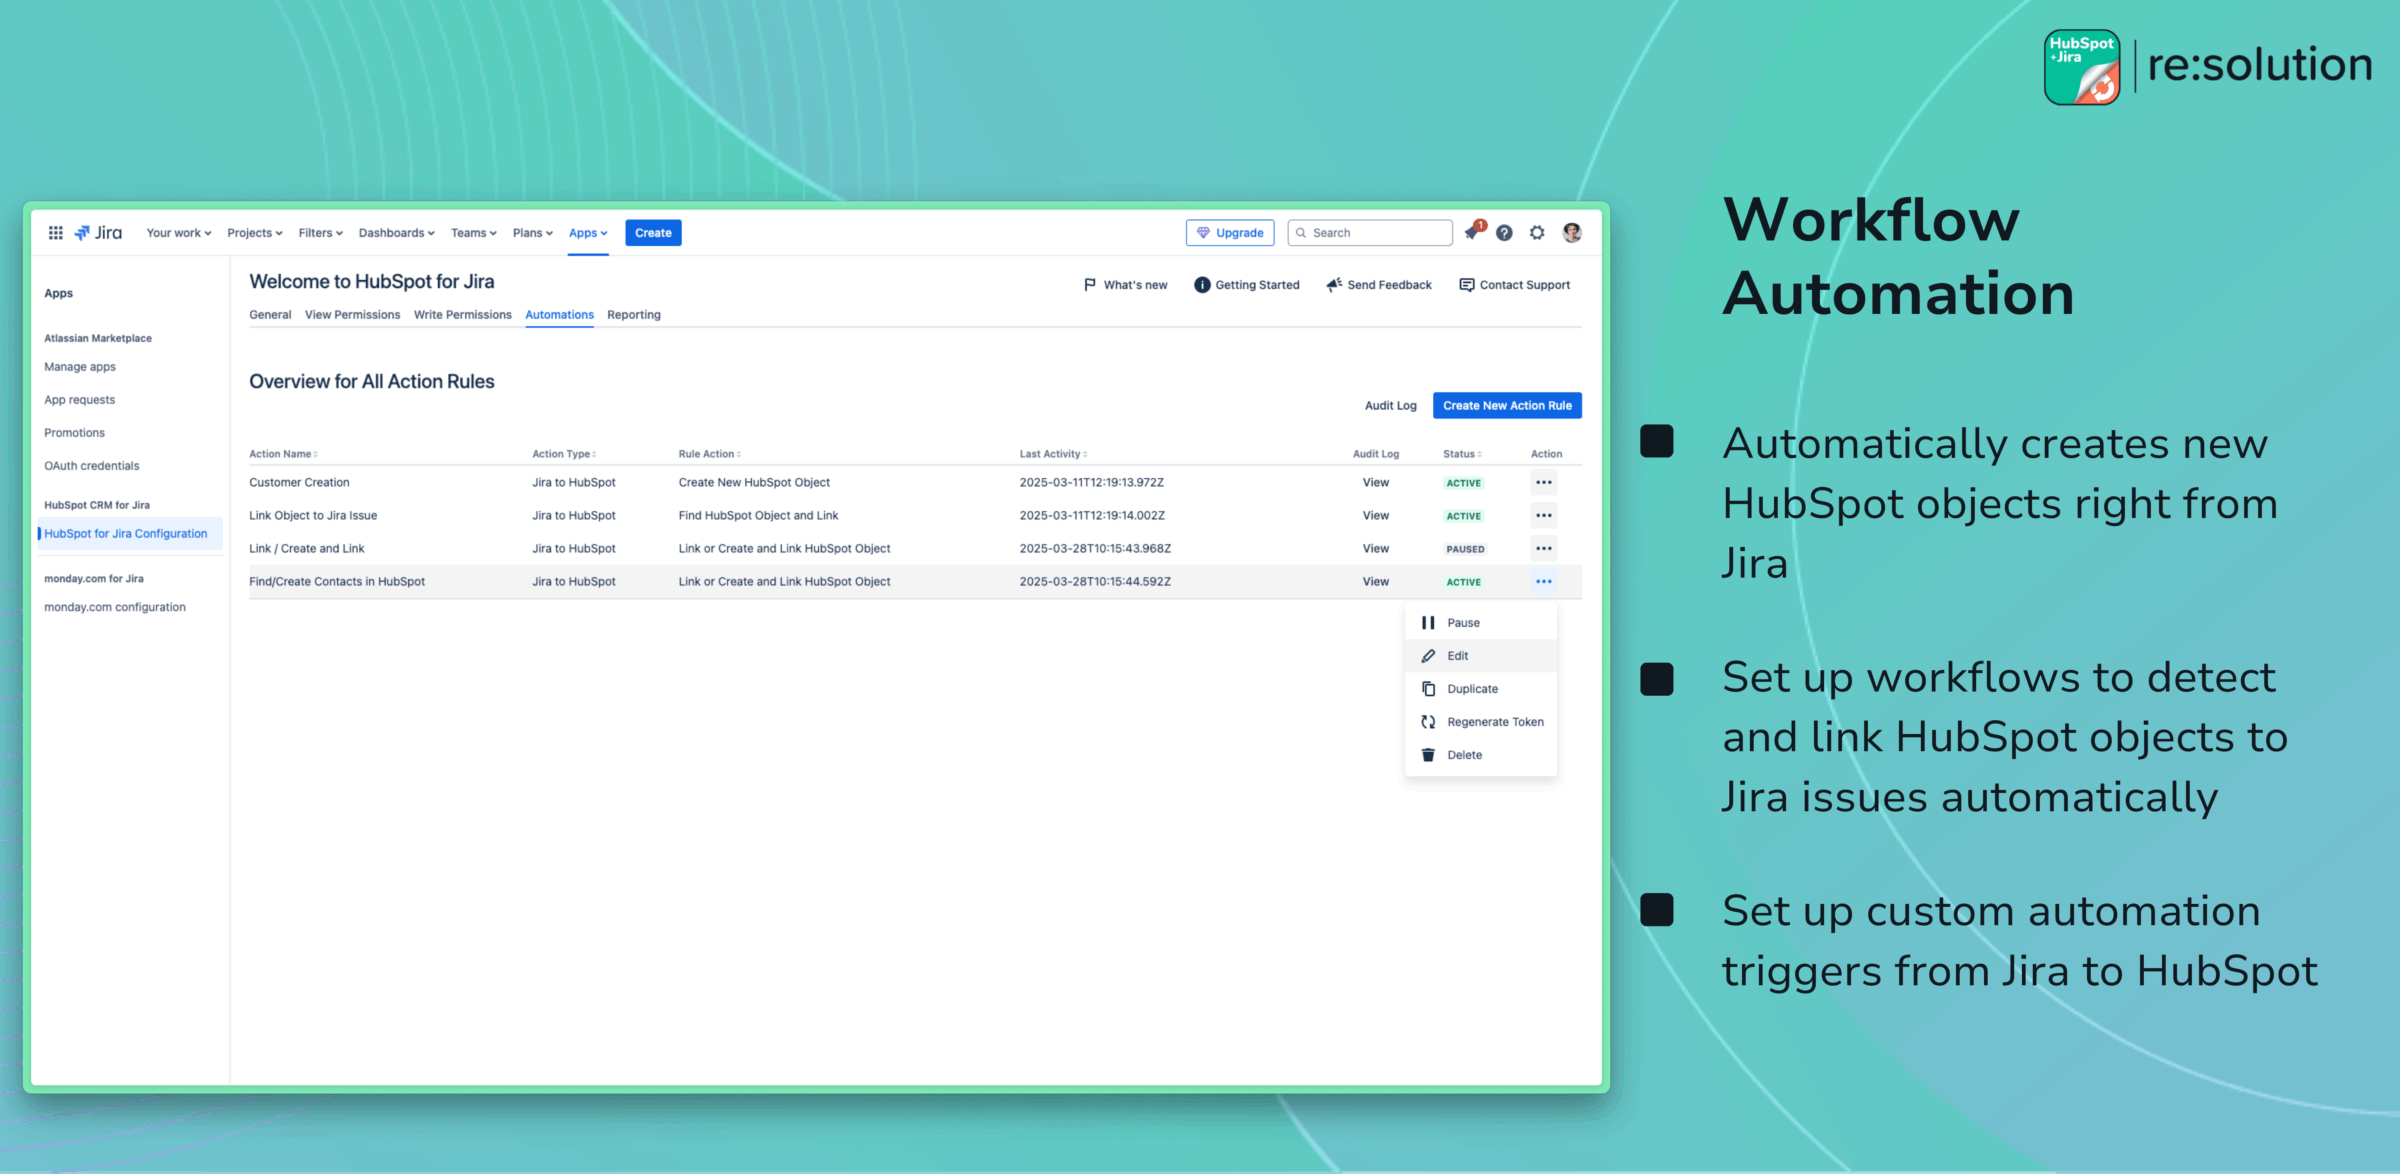
The good news for Jira and HubSpot users is that the HubSpot for Jira app now includes powerful automation actions that bring the two platforms even closer. These new features allow Jira’s native automation engine to directly interact with HubSpot, so you can build rules that update your CRM whenever something happens in Jira. The three key automation capabilities now available are:
-
Create New HubSpot Object: This action allows Jira to automatically create a new record in HubSpot (such as a Contact, Company, Deal, or Ticket) when certain conditions are met. For instance, if a new high-priority issue is created in Jira Service Management for a customer, you could configure a rule to “create a HubSpot object” (like a ticket or deal) right from Jira. The new HubSpot record will be populated with details from the Jira issue (e.g. issue summary or reporter email) and linked back to the issue. This ensures that your sales or support team in HubSpot immediately knows about the new item without any manual data entry.
-
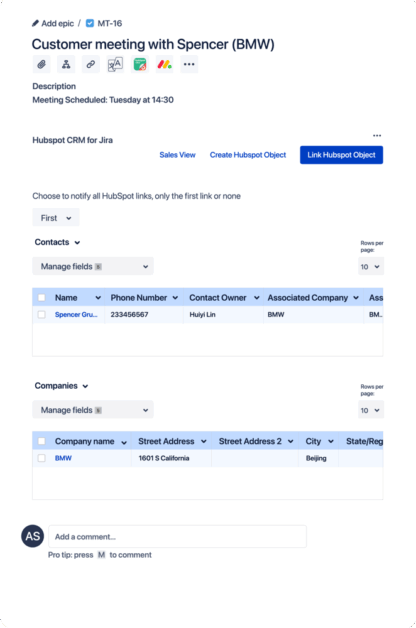
Find HubSpot Object and Link: Instead of creating duplicate records, this action tries to find an existing HubSpot CRM object and link it to the Jira issue. The rule might search HubSpot for a contact or company that matches a field on the Jira issue (for example, matching the reporter’s email to a HubSpot contact). If it finds a match, it will automatically associate that HubSpot record with the Jira issue. In practice, this means when an issue is logged, Jira can say “oh, this email belongs to Spencer at BMW, let me link the issue to that existing contact and company in HubSpot” – just like clicking “Link HubSpot Object” but done for you by the rule. This saves time and keeps data structured correctly: your CRM remains the central hub of customer info, and all relevant Jira issues get attached to the right customer records.
-
Link or Create and Link HubSpot Object: This combined action gives you the best of both worlds in one step. If a corresponding HubSpot record exists, it will find and link it; if not, it will create a new HubSpot object and then link it to the Jira issue – all automatically. In other words, whether the customer is new or existing, the Jira issue ends up connected to a HubSpot object either way. This is especially useful in service desk scenarios: say a support ticket comes in from a customer not yet in HubSpot – the rule can create a new contact or ticket in HubSpot for you. But if the customer is already in HubSpot, the rule will simply attach the issue to that existing contact record. This intelligent automation ensures no Jira issue gets left orphaned without a CRM link. Your teams will always have the context they need, as Jira issues will be associated with the proper customer or deal in HubSpot automatically.
These features supercharge the integration by handling in seconds what used to take minutes of manual work digging through HubSpot or copying information. By using Create, Find, or Link-or-Create actions, you guarantee that every relevant Jira issue is reflected in HubSpot (and kept updated), which keeps both teams aligned.
Example of creating a new HubSpot record from Jira: The HubSpot for Jira app lets a Jira user (or automation rule) fill in details for a new HubSpot object (like a Deal, as shown here) without leaving Jira. Once created, the object will appear in HubSpot and be linked to the Jira issue, so both systems stay in sync
How the Automation Works (Jira-to-HubSpot, for Now)
You might be wondering how all of this actually works under the hood. The beauty is that it leverages Jira’s robust automation rule engine, which many teams already use for all sorts of internal workflows. In Jira automation, every rule starts with a trigger – an event or condition that kicks off the rule. These triggers can be anything from “Issue Created” or “Issue Transitioned” to a field value change or a scheduled time. Once triggered, the rule can perform a series of actions.
With the HubSpot for Jira integration installed, you gain new HubSpot actions in that automation toolbox. So, for example, you can set up a rule: When a Jira issue is created with Type = Incident, then Create a HubSpot Ticket. The trigger (issue created) causes the action (create HubSpot object) to fire. Jira will connect to HubSpot (via the app’s secure API connection) and send over the data to create the ticket in HubSpot, then record the HubSpot ID back on the Jira issue. All of this happens behind the scenes in seconds, without any user intervention.
Currently, the automation flow works one-way: from Jira to HubSpot. That means Jira is the one listening for events and then pushing updates to HubSpot. This covers a lot of common use cases, since many teams want Jira issues (support cases, bugs, tasks, etc.) to automatically register in the CRM. HubSpot for Jira’s latest version focuses on these Jira-driven triggers that update HubSpot.
It’s worth noting that HubSpot-to-Jira triggers (where something happening in HubSpot could initiate a Jira action) are not yet available in the app’s automation features – but they are expected to come later. In the meantime, HubSpot does allow some automation on its side (HubSpot workflows can create Jira issues using the integration), but a fully automated two-way sync via Jira rules is a future enhancement. Even with the current one-way setup, teams are finding immense value: changes in Jira can seamlessly maintain CRM data. As the integration evolves toward two-way automation, we can expect even tighter coupling (for instance, a closed deal in HubSpot might automatically trigger a Jira task for onboarding in the future).
In summary, the automation works by using Jira’s no-code rule builder to bridge over to HubSpot. Triggers in Jira lead to actions in HubSpot, using the new capabilities provided by the HubSpot for Jira app. It’s simple but powerful – essentially an “if this, then that” across your two most important systems.
Easy Setup: Creating a Jira-HubSpot Automation Rule
One of the best parts of this solution is how user-friendly it is to set up. You don’t need to be a programmer or write any code to automate Jira and HubSpot – Jira’s automation interface is designed for all users with a straightforward visual rule builder. “No code, just drag and drop” as Atlassian describes it. Setting up a new rule takes just a few clicks. Here’s a high-level guide to configuring an automation rule connecting Jira and HubSpot:
-
Choose Your Trigger: In Jira (Cloud), navigate to your project settings and find the Automation section. Click Create Rule, and you’ll first be prompted to pick a trigger. Select the event that will start your rule. For example, you might choose Issue Created (to act whenever a new issue is made) or Issue Updated (for instance, when a certain field like “Customer Email” is populated). This trigger defines when the rule will run.
-
Add Conditions (Optional): You can narrow down the rule to only specific issues or criteria using conditions. For example, you might add a condition: Project = Customer Support or Issue Type = Bug, so that the rule only runs for those cases. Conditions help ensure the automation only does what you want it to, when you want it.
-
Add HubSpot Action: Next, you’ll add the action that should occur in HubSpot. Thanks to the HubSpot for Jira app’s new features, you will see actions like Create HubSpot Object, Find and Link HubSpot Object, or Link or Create HubSpot Object available to choose. Select the appropriate action based on your use case. For instance, if your rule is handling new issues, you might pick Link or Create HubSpot Object to cover both existing and new customers. When you add this action, you’ll be asked to configure its details – such as which HubSpot object type to target (contact, company, deal, or ticket) and what fields to use for matching or creating. This is where you map Jira data to HubSpot: e.g. use the reporter’s email to find a Contact, or use the issue’s summary as the new Deal name. The app makes this configuration straightforward with dropdowns and field pickers.
-
Test and Turn On the Rule: Once your trigger and action (and any conditions) are set, simply turn on the rule. It’s a good idea to test it with a sample issue to ensure everything works as expected. Jira’s automation editor often provides a way to simulate the rule or you can just create a dummy issue that meets the trigger criteria. When the rule runs, you should see the results in HubSpot (a new object created or a link added to an existing object, or alternatively you can double check the HubSpot for Jira app’s automation logs to determine if your rule executed successfully or not). Jira will also log the execution under the rule’s details (“Rule executions”), so you can confirm it was successful or troubleshoot if needed.
That’s it – the setup is truly that approachable. A Jira admin or project lead can configure an integration rule in minutes, without writing a single line of code. And because it’s built on Jira’s native automation, you have full control and visibility. You can edit the rule at any time, add more actions (even add multiple HubSpot actions if you wanted to, say, link a contact and create a deal), or expand the rule with additional conditions. Automation rules can also be shared or applied across multiple projects if necessary.
Keep in mind that you will need to have the HubSpot for Jira app installed and connected to your HubSpot account beforehand (with the proper permissions granted) – but that is typically a one-time setup done by an admin. Once the integration is in place, setting up the automation rule is the easy part.
The bottom line: Jira’s automation is a “no-code” drag-and-drop rule builder that anyone can use to automate work. This means empowering your team – not just developers, but support agents, project managers, etc. – to create smart workflows that connect Jira and HubSpot in ways that make everyone’s job easier.
Conclusion: Work Smarter with Jira-HubSpot Automation
Automating the workflow between Jira and HubSpot using the HubSpot for Jira app enables teams to work more effectively and eliminate a lot of manual busywork. By letting the software handle the data syncing and record keeping, your people can spend more time solving customer problems and less time updating two systems. Issues logged in Jira are immediately reflected in HubSpot, so sales and service have the context they need; likewise, customer info from HubSpot is visible in Jira for engineers or agents to act on. This kind of integration ensures that Jira and HubSpot are always in lockstep – truly a single, unified platform (virtually) from the user’s perspective.
Perhaps most importantly, this automation eliminates manual data entry between the two platforms. No more copying and pasting ticket IDs, customer names, or statuses from one tool to the other. This not only saves time, but also dramatically reduces errors and inconsistencies that often creep in with manual updates. When a process is automated, it happens the same way every time, so you can trust that the CRM and the issue tracker are showing the same information. Teams can avoid the frustration of missing info or outdated details and can instead focus on productive work and collaboration.
By using features like Create New HubSpot Object or Find and Link in your Jira automation rules, every Jira issue that matters to customer management is properly tracked in HubSpot. This means your sales team can get updates on open tickets or development tasks without constantly pinging the dev team, and your support team can see key customer insights from HubSpot without leaving their Jira queue. Each team works in the tool they know best, yet the automation connects their workflows in a seamless way.
In a world where efficiency and customer-centric responsiveness are key, automating the connection between Jira and HubSpot gives your organization a competitive edge. It streamlines internal collaboration and ensures nothing falls through the cracks. As Atlassian notes, with automation “your work will simply flow, allowing your team’s productivity to hit all-time highs”. By taking advantage of the HubSpot for Jira app’s new automation capabilities, teams can work smarter together – delivering better results with less effort. It’s a professional approach to workflow optimization, delivered in an approachable, no-code package that any team can leverage.
In short, Jira-HubSpot automation turns two powerful platforms into one cohesive workflow. The improved efficiency, synchronized data, and freedom from manual data entry allow your teams to concentrate on what really matters: solving problems, serving customers, and driving business forward. If you’re using Jira and HubSpot today, now is the time to let them do the busywork for you – and watch your cross-functional productivity soar.
