

At its heart, a Microsoft Teams Meeting is your digital conference room, built for the way we work today. It’s a single, unified space that pulls together video calls, audio, chat, and file sharing into one collaborative hub, making it an indispensable tool for businesses and organizations everywhere.
Your Digital Conference Room Explained
Don’t just think of Microsoft Teams Meetings as another video call app. Picture it as your team’s central command for collaboration. It’s like walking into a real-world conference room and finding every tool you need right at your fingertips. Instead of a physical whiteboard, you have a digital one. Instead of passing around paper documents, you share and edit files instantly.
This all-in-one approach is what truly makes it stand out.
The platform’s incredible growth tells the story. The time we all spend in meetings has skyrocketed, with daily meeting minutes on Teams jumping from a massive 560 million in early 2020 to an astronomical 330 billion by 2024. This isn’t just a trend; with over 145 million people using it daily, it shows how deeply Teams is woven into the fabric of modern work. You can get a closer look at the numbers by exploring the latest Microsoft Teams usage statistics.
More Than Just Video Calls
While video is front and center, the real magic of Microsoft Teams is how it centralizes teamwork. It’s where conversations start, decisions get made, and projects actually move forward—all within the same ecosystem. For a deeper dive into all its features, you can explore the Microsoft Teams platform.
The integrated model delivers some key wins for any team:
- Unified Experience: Everything related to the meeting—from the agenda shared beforehand to the follow-up actions afterward—lives in one spot. No more hunting through emails.
- Persistent Chat: The conversation doesn’t just vanish when the call ends. The chat history sticks around, creating an ongoing record of discussions and key decisions.
- Seamless File Sharing: You can share and even co-author documents in real-time, right inside the meeting window. This kills the frustrating habit of toggling between different apps.
By blending video, chat, and file collaboration, Microsoft Teams Meetings create a persistent workspace that mirrors and often improves upon traditional in-person collaboration. It ensures context is never lost, and every participant has access to the same information.
This guide is your roadmap to mastering it all, from scheduling your very first meeting to running advanced, collaborative sessions. We’ll start with the fundamentals and build your skills step-by-step, so you can turn simple video calls into genuinely productive work.
How to Schedule Your First Teams Meeting
Alright, now that you’ve got the basics down, it’s time to jump in and schedule your first meeting. The good news is that Microsoft Teams makes this incredibly simple. You can create a meeting right from the Teams app itself or through your Outlook calendar—both routes get you to the same place, so it just comes down to your personal workflow.
Let’s walk through the process of sending out an invitation, locking down the right settings for a smooth and secure call, and understanding what those options really do. Getting this right from the start ensures your first meeting goes off without a hitch.
Creating a Meeting in the Teams App
The most direct way to get a meeting on the books is by using the Teams application. It’s quick, efficient, and keeps everything related to your team’s communication in one spot.
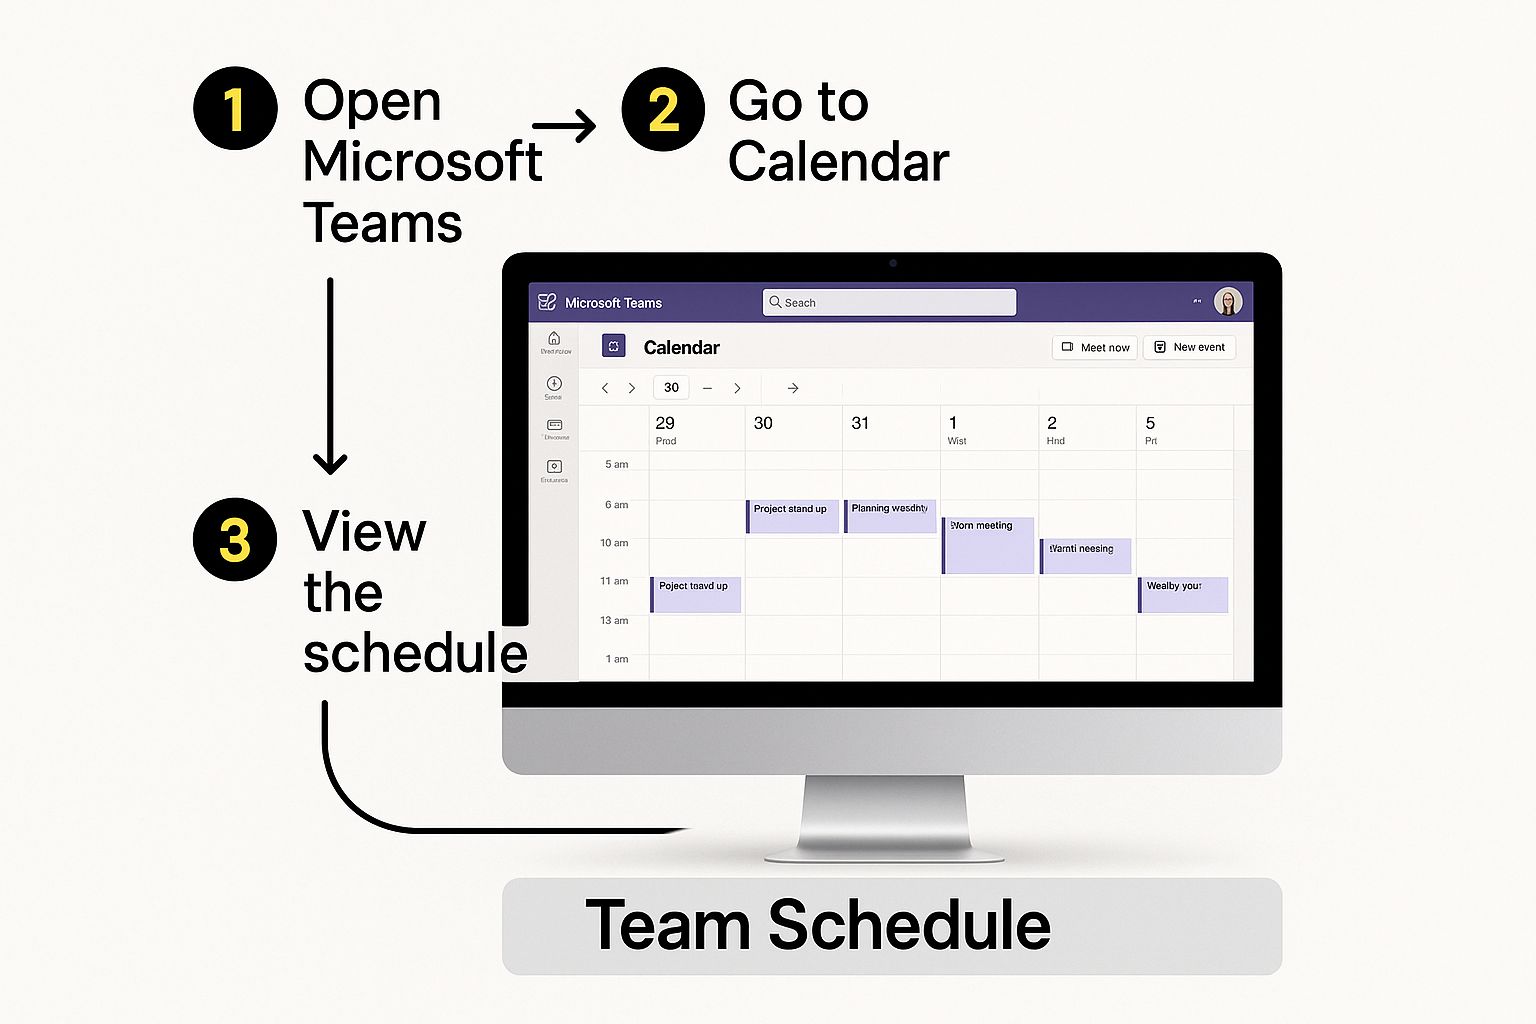
- Head to the Calendar: First, open the Teams app and click the Calendar icon on the left-hand menu. This is your command center for all upcoming appointments.
- Start a New Meeting: Look to the top-right corner and click + New meeting. This will pop open the scheduling form where the magic happens.
- Fill in the Details: Give your meeting a clear, descriptive title. No one likes a mystery invite. Start typing the names or email addresses of your attendees, and Teams will handily suggest people from your organization.
- Set the Time and Date: Pick your start and end times. If this is a recurring meeting, like a weekly team check-in, use the “Repeat” dropdown menu to set up a regular schedule. Easy.
Here’s a look at the clean scheduling interface inside the Teams calendar. It clearly shows you where to plug in all your essential meeting info.
Once the core details are in, don’t forget to use the main text box to add a meeting agenda. A solid agenda is the difference between a productive session and a chaotic one. If you need some inspiration, these team meeting agenda examples are a great resource for making sure everyone shows up ready to contribute.
Customizing Your Meeting Options
Before you smash that “Send” button, pause for a moment to fine-tune your meeting options. Think of this as your control panel for the entire event—it’s where you manage who gets in and what they can do once they’re there.
To get there, send the invite, then open the meeting back up from your calendar and select Meeting options. This is where you can dial in some critical settings.
A few key settings will make or break your meeting’s flow and security. Let’s take a look at the options you’ll want to configure.
| Setting | What It Does | Recommended Use Case |
|---|---|---|
| Who can bypass the lobby? | Controls who can join the meeting directly vs. who has to wait to be admitted. | People in my organization is a great default. External guests will wait in a virtual lobby until you let them in. For highly confidential calls, set it to Only me and co-organizers for maximum security. |
| Who can present? | Determines who has the ability to share their screen or content. | By default, everyone can present. To avoid accidental takeovers, switch this to Specific people and choose your designated presenters. |
| Allow mic and camera for attendees? | Lets you mute attendee microphones and disable their cameras automatically upon joining. | For large meetings or webinars, turning these off at the start can drastically reduce initial noise and distractions. |
Setting these options up front transforms a potentially chaotic free-for-all into a professionally managed event. You’re establishing clear roles and security from the get-go, which makes a world of difference.
Mastering Core Features for Productive Meetings
So, your meeting is live. Now what? The real magic happens when you move everyone from just watching to actually doing. This is where the core features inside Microsoft Teams meetings shine, transforming a simple video call into a dynamic workshop. Your screen becomes a shared space for genuine teamwork.
Think of these features as your digital toolkit. An in-person workshop has whiteboards, handouts, and breakout tables. A Teams meeting has digital equivalents that are often even more powerful. Let’s look at how to put them to work.

From Sharing Screens to Sharing Ideas
Screen sharing is the bedrock of virtual collaboration, but its true power is in how you use it. Don’t just show a static slide. Use it to walk through a workflow, demonstrate a software bug, or get live feedback on a design mock-up. It makes abstract concepts concrete and visible for everyone.
For example, a marketing team can share their screen to review an analytics dashboard together. They can spot trends and brainstorm campaign adjustments in real time, which is far more productive than trying to discuss data points from memory.
The Power of the Virtual Whiteboard
The Microsoft Whiteboard is your team’s canvas for brainstorming. It perfectly captures the creative energy of huddling around a physical whiteboard, but with the bonus of digital tools and infinite space. It’s brilliant for visual exercises that get ideas flowing.
Imagine you’re running a SWOT analysis (Strengths, Weaknesses, Opportunities, Threats) in a strategy session.
- Create Four Quadrants: Quickly draw four sections on the whiteboard for each category.
- Invite Collaboration: Give everyone access to add digital sticky notes to the right spots.
- Organize and Discuss: As ideas pop up, you can group related notes, draw connections, and highlight key themes. You’re literally creating a visual map of the team’s thinking.
This method gives everyone a voice, not just the loudest person in the room. It turns a one-way presentation into a multi-directional conversation—a cornerstone of truly effective virtual meetings.
The virtual whiteboard isn’t just a feature; it’s a philosophy. It shifts the focus from a single presenter to a group of co-creators, fostering a sense of shared ownership and active contribution from every participant.
Make Presentations Interactive with PowerPoint Live
We’ve all been there: the presenter is clicking through slides too fast, or way too slow. PowerPoint Live fixes this by handing some control back to the attendees. When you present this way, participants can privately navigate the slides at their own pace without disrupting the main flow.
This is a game-changer for comprehension. Someone who needs more time on a data-heavy slide can linger, while another who’s already familiar with a section can skip ahead. It’s a simple feature that respects individual learning styles and keeps everyone locked in.
Managing Communication with Chat and Reactions
The meeting chat is for more than just saying “hello.” It’s a crucial backchannel for side conversations that don’t need to derail the main speaker. Attendees can ask clarifying questions, share relevant links, or add quick thoughts without having to unmute.
To keep things tidy, encourage everyone to use the “Reply” function. This creates threaded conversations so important questions don’t get lost in the scroll.
Live reactions also offer a quick, non-disruptive way to gauge the room’s energy.
- Thumbs Up: Signals agreement or understanding.
- Heart: Shows appreciation for an idea or comment.
- Applause: Celebrates a win or milestone.
- Raise Hand: Formally requests to speak, which keeps the conversation orderly.
Using these tools thoughtfully turns a monologue into a true dialogue, making your Microsoft Teams meetings feel more connected and alive. By mastering these core features, you can replicate—and often even surpass—the collaborative energy of an in-person gathering.
Using Advanced Tools and AI Features
Once you have the basics down, it’s time to unlock the features that transform a standard Microsoft Teams meeting into a powerhouse of efficiency. This is where we go beyond just talking and start using the smarter, AI-driven tools to get real work done.
Think of these advanced features as a digital assistant. They’re built to tackle the classic meeting headaches: information overload, people losing focus, and making sure every single person’s voice is actually heard. They help you capture what matters and give your conversations the structure they need to be effective.
Making Meetings Accessible and Searchable
Two of the most practical tools you can start using immediately are Live Captions and Transcription. Don’t just think of them as accessibility features—they’re game-changers for clarity and record-keeping.
Live Captions display real-time subtitles right on the screen. This is a lifeline for anyone who is hard of hearing, stuck in a noisy coffee shop, or isn’t a native speaker. It ensures no one misses a critical update simply because they couldn’t catch the audio perfectly.
Transcription takes it a huge step further by creating a complete, time-stamped text document of the entire conversation.
- Creates a Searchable Record: Can’t remember what was decided about the Q3 budget? Instead of scrubbing through an hour-long video, you can just search the transcript for “Q3 budget.”
- Identifies Speakers: The transcript clearly marks who said what, which provides invaluable context when you’re reviewing decisions later.
- Improves Focus: When everyone knows a full transcript is being generated, they can stop taking frantic notes and be more present in the actual discussion.
By automatically documenting the conversation, transcription turns your meetings into a valuable, searchable knowledge base. It ensures key decisions and discussions are captured accurately and are easily accessible long after the meeting ends.
Your AI Assistant: Microsoft Copilot
Microsoft Copilot is the AI engine baked right into Teams, acting like your personal meeting assistant. It takes over the tedious administrative work and delivers smart summaries, freeing up your team to focus on the big picture. We’ve all felt that post-meeting dread of having to synthesize pages of notes; Copilot is designed to eliminate that.
Picture this: a teammate joins 15 minutes late. Instead of halting the flow to bring them up to speed, they can just ask Copilot, “Summarize the meeting so far.” Copilot will instantly provide a bulleted list of topics discussed and any decisions made.
It can also:
- Generate Action Items: At the end of the meeting, ask Copilot to “list all action items and who they are assigned to.” It will scan the entire conversation and pull out a clean, actionable task list.
- Uncover Unresolved Questions: Prompt it with, “What questions were asked that haven’t been answered?” to make sure no important issues slip through the cracks.
- Provide a Full Summary: After the meeting, Copilot can generate a detailed summary with key points, outcomes, and tasks, ready to be shared.
While Teams has powerful built-in AI, don’t forget that other AI tools for research and productivity can also supercharge how you prepare for and follow up on your meetings.
Driving Focused Discussions with Breakout Rooms
Ever tried to have a meaningful discussion in a meeting with 20 people? It’s nearly impossible. Breakout Rooms solve this problem by letting you split your main meeting into smaller, separate virtual rooms for focused group work. It’s the perfect tool for workshops, training, and brainstorming.
For instance, during a project retrospective, you could divide a team of twelve into three breakout rooms of four people each. You can assign each group a specific prompt—what went well, what went wrong, and what should we change—before bringing everyone back to share their findings. This structure gives everyone a chance to contribute, not just the loudest voices in the room. These focused sessions are especially useful for agile ceremonies, and you can learn more about how to run effective daily stand-up meetings to see how structured conversations drive results.
Gathering Instant Feedback with Advanced Polling
Finally, advanced polling is your go-to for gathering structured feedback in real time. Instead of asking a vague question like, “So, are we all in agreement?” you can launch a quick multiple-choice poll. You get instant, quantifiable data.
This is brilliant for making quick decisions, prioritizing a list of tasks, or just getting a gut check on team sentiment. It makes feedback clear, measurable, and immediate.
Best Practices for Engaging Virtual Meetings

Having powerful tools is one thing; using them effectively is another beast entirely. A successful Microsoft Teams meeting depends just as much on the people as it does on the tech. It’s all about mastering the human side of virtual collaboration to turn passive screen time into active, engaging work sessions where every voice is heard and every minute counts.
This takes a real shift in mindset. You’re not just hosting a call; you’re facilitating a structured, purposeful event. When you get it right, you can capture the focused energy of an in-person workshop, even when your team is scattered across the globe.
Set the Stage for Success
The work for a great meeting starts long before anyone clicks “Join.” Laying the proper groundwork prevents conversations from drifting off-course and ensures everyone shows up ready to contribute from the get-go.
Your first step, always, is a well-defined agenda. Think of it as the roadmap for your discussion. A great agenda goes beyond a simple list of topics; it should include timing for each item and, most importantly, clarify the goal. Are we here to brainstorm, make a decision, or just share information? Knowing the objective helps everyone focus their input.
The small details also project professionalism and maintain focus. Encourage everyone to find a quiet space with decent lighting. Using a blurred or professional virtual background is a simple trick that minimizes distractions, helping the team concentrate on the meeting itself rather than what’s going on in someone’s kitchen.
Establish Clear Meeting Etiquette
Once everyone’s in the call, establishing some clear ground rules—or meeting etiquette—is crucial for a smooth and respectful experience. Without these shared norms, virtual meetings can quickly spiral into chaos, with people talking over each other or disengaging completely.
Start with the basics:
- Mute by Default: Ask everyone to keep their microphone muted unless they are actively speaking. This one simple habit eliminates the distracting background noise—like typing or a barking dog—that can completely derail a conversation.
- Use the “Raise Hand” Feature: To avoid constant interruptions, get your team in the habit of using the “Raise Hand” button. This creates an orderly queue and makes sure everyone gets a chance to speak without having to fight for airtime.
- Camera On (If Possible): While not always feasible, encouraging cameras to be on helps build connection and lets you pick up on critical non-verbal cues. It creates a genuine sense of presence and accountability.
By setting these expectations right at the start, you create a psychologically safe environment. When people feel respected and know the rules of engagement, they’re far more comfortable sharing their honest ideas. This structure is the foundation for real collaboration.
Beyond the technical setup, it’s vital to implement effective team communication strategies that ensure every interaction is a productive one.
Encourage Active Participation
Let’s be honest, one of the biggest challenges in any meeting is making sure quieter team members have the space to contribute. In a virtual setting, it’s even easier for some voices to get lost. As a facilitator, it’s your job to actively draw participation out of everyone.
A simple yet powerful technique is to call on people directly, but in a supportive way. For example, “Sarah, you have a lot of experience in this area. What are your thoughts on this proposal?” This shows you value their specific expertise and gives them a clear, low-pressure opening to speak.
If you feel your meetings are getting stale and need a jolt of energy, don’t be afraid to mix things up. You can find a wealth of practical meeting engagement ideas to bring new life to your calls.
Conclude with Clarity and Purpose
How you end a meeting is just as important as how you start it. A strong conclusion ensures that all the momentum you built translates into real-world progress. A meeting should never end without crystal-clear, actionable next steps.
Always reserve the final few minutes to summarize the key decisions and explicitly state the action items. For each action, assign an owner and a deadline. Right there, in front of everyone. This creates immediate accountability and ensures critical tasks don’t fall through the cracks. It’s a simple habit that transforms your meetings from talk-fests into the true engines of your projects.
How to Troubleshoot Common Meeting Problems
Even with perfect preparation, technology sometimes has a mind of its own. When a Microsoft Teams meeting hits a snag, it’s more than a minor hiccup—it can kill momentum and frustrate everyone involved. Think of this section as your first-aid kit for handling the most common technical issues with speed and composure.
When things go wrong, always start with the simplest fix first. It’s a process of elimination. Before you start digging into complex settings, check the absolute basics. Is your internet connection stable? Are your headphones actually plugged in all the way? You’d be surprised how often the most obvious problems have the simplest solutions. A quick restart of the Teams app can also work wonders, clearing out temporary glitches in just a few seconds.
Resolving Audio and Video Glitches
There’s nothing worse than poor audio or a frozen video feed. When your voice sounds robotic or your camera gives up, the entire flow of conversation grinds to a halt. Don’t panic. Run through these quick diagnostic steps.
First, let’s confirm which devices Teams is actually trying to use.
- Click the three dots (…) at the top of your meeting window, then navigate to Settings > Device settings.
- Under Audio devices, make sure your preferred microphone and speakers are selected from the dropdown menu.
- Do the same for your Camera, ensuring the correct webcam is active.
It’s also possible that another application has hijacked your camera or microphone. Close any other programs that might be using them, like Zoom, Skype, or even a browser tab where you recently used a video service. This frees up the hardware so Teams can have exclusive access.
A critical step people often forget is checking for driver updates. Outdated audio or video drivers are a classic cause of compatibility problems, especially right after a Windows or Teams update. A quick trip to your computer’s device manager can save you a world of headache.
Fixing Screen Sharing and Joining Failures
Another common point of frustration is screen sharing. You hit the “Share” button, but nothing happens, or your colleagues just see a black screen. This is frequently a permissions issue, especially on macOS, which requires you to explicitly grant screen recording access to Microsoft Teams in your System Settings under Privacy & Security.
If someone can’t join your meeting, the problem usually boils down to meeting policies or how the lobby is configured.
- Check the Lobby: Did you accidentally leave a guest waiting in the virtual lobby? Keep an eye on the participant list for anyone needing to be admitted.
- Review Admin Settings: In some companies, IT administrators configure policies that restrict guest access or prevent people from joining on unmanaged devices. If external partners constantly have trouble connecting, a quick chat with your IT department might be in order.
Building a smooth, predictable process is key—not just for running meetings, but for fixing them when they break. It’s a lot like troubleshooting your team’s workflow during a project retrospective. You can apply the same problem-solving mindset by mastering the retrospective in sprint meetings to systematically figure out what went wrong and how to fix it. This structured approach keeps disruptions to a minimum and your team moving forward.
Of course! Here is the rewritten section, designed to sound like it was written by an experienced human expert, following all your specified requirements.
Frequently Asked Questions
As you get more comfortable with Microsoft Teams, a few questions are bound to pop up. Let’s tackle some of the most common ones so you can clear any hurdles and make the most of your meetings.
Can People Without a Teams Account Join a Meeting?
Yes, they absolutely can. When you schedule a meeting, anyone you invite can join as a guest right from their web browser. There’s no need for them to have a Microsoft Teams account or even install the app.
All they have to do is click the meeting link and type in their name. This makes it incredibly simple to meet with external clients, partners, or interview candidates without making them jump through hoops or sign up for a new service.
What Is the Maximum Number of Meeting Participants?
For most day-to-day work, standard interactive Microsoft Team meetings are more than enough. They support up to 1,000 participants who can all share audio, video, and chat.
But what if you need to go bigger? Teams has you covered for larger audiences:
- Webinars: These are built for up to 10,000 attendees and come with extra features like custom registration pages and attendee reporting.
- Live Events: If you’re hosting a massive broadcast like a company-wide town hall, Live Events can handle up to 20,000 view-only attendees.
Keep in mind, these numbers can vary a bit depending on your organization’s specific Microsoft 365 license. It’s always smart to double-check your plan’s details to know exactly what you’re working with.
How Do I Record a Meeting and Where Is It Stored?
Recording a meeting is straightforward. Any organizer or presenter can kick it off by clicking the More actions (…) menu in the meeting controls and hitting Start recording. For full transparency, everyone in the meeting gets a notification that a recording has started.
Once the meeting wraps up, Teams processes the video and saves it automatically. Where it ends up depends on the type of meeting it was:
- Channel Meetings: The recording is saved to the SharePoint site connected to that specific Teams channel.
- All Other Meetings: The video file goes straight to the OneDrive folder of the person who hit the record button.
Either way, a link to the recording is posted right in the meeting chat, so it’s always easy for participants to find and rewatch later.
Are your agile meetings stuck in a rut? resolution has the solution. With NASA – Not Another Standup App, you can facilitate structured, engaging meetings right within Jira. Say goodbye to unfocused discussions and hello to clear actions, balanced participation, and measurable outcomes. Bring real clarity and efficiency to your team’s collaboration by exploring NASA from resolution.
