
If you’re an Atlassian admin, you know the feeling. Staring down a list of new hires or departing employees can be a real headache. Manually creating, updating, and deactivating every user account is more than just a time-sink; it’s a massive security and compliance risk that most growing companies simply can’t afford.
The solution? User lifecycle automation in Jira. It’s the only way to build a secure, consistent, and efficient user management process that works from day one to the very last.

Why Manual User Management Is a Risk You Can’t Afford
When you have a small team, handling user accounts by hand seems manageable. But as your company scales, that “manageable task” quickly spirals into a huge liability.
Think about it. Each new hire needs an account, the right group memberships, and specific project permissions. Every one of those manual steps is a chance for something to go wrong.
The real danger, though, is during offboarding. An ex-employee’s account that isn’t shut down properly and immediately becomes a gaping security hole. They could still have access to sensitive project data, customer information, or your company’s intellectual property long after they’ve left. This isn’t some theoretical threat—I’ve seen it happen, and the fallout is always costly.
The Hidden Costs of Inefficiency
The pain of manual processes goes beyond just security. It creates a productivity black hole that swallows time from everyone involved. I’ve seen new engineers wait days for the right Jira access, completely blocked from contributing to their team’s sprint. It’s frustrating for the new hire and a drag on the entire project’s momentum.
These bottlenecks are exactly why Atlassian keeps pushing its automation capabilities. In 2024 and 2025, they even rolled out AI-powered features to help organizations on sites with up to 50,000 users automate complex workflows. The goal is always the same: cut down on repetitive work and get projects moving faster.
The real problem with manual user management isn’t just the hours it eats up; it’s the inconsistency. One admin might remember to remove a user from every single project role, but another might forget one, leaving a security gap wide open. Automation completely removes that human error from the equation.
Before we dive into the how, let’s put the contrast between manual and automated processes in black and white. It really highlights the impact automation can have on your day-to-day operations and overall security posture.
Manual vs Automated Jira User Lifecycle Management
| Lifecycle Stage | Manual Process Pain Points | Automated Process Benefits |
|---|---|---|
| Onboarding | Slow access provisioning, inconsistent permissions, productivity delays for new hires. | Instant account creation with correct permissions, standardized access levels, immediate productivity. |
| Updates | Prone to human error when changing roles, delayed access to new projects. | Role changes in IdP auto-update Jira groups, seamless access to new resources. |
| Offboarding | High risk of lingering access, potential data breaches, compliance failures. | Immediate, complete deactivation of accounts, secure and compliant offboarding every time. |
| Auditing | Time-consuming manual checks, difficult to prove compliance, high margin for error. | Centralized logs, easy-to-generate compliance reports, clear audit trail of all actions. |
Looking at this, it becomes pretty clear that clinging to manual methods is like choosing to walk when you could be driving a sports car. It’s just not sustainable.
Real-World Scenarios Where Manual Fails
Let’s get specific. Imagine a fast-growing tech company bringing on ten new people in a single week. The lone Jira admin is completely swamped. Here’s what happens:
- A new sales rep is accidentally granted access to a top-secret engineering project.
- A remote developer sits on their hands for two full days waiting for access to the team’s Kanban board, missing the entire sprint planning meeting.
- An employee who was let go last week still has an active account with full access to customer data.
These aren’t just minor slip-ups; they are serious operational failures. The best way to prevent them is by building a foundation on solid data security best practices.
A huge piece of that puzzle is how you handle inactive accounts, which we cover in our guide to https://www.resolution.de/post/atlassian-inactive-user-management/. This isn’t just about saving a few hours—it’s about building a Jira environment that is secure, compliant, and ready to scale with your business.
Laying the Groundwork for Flawless Automation

It’s tempting to jump right into building automation rules, but let’s be real—doing that without any prep work is a surefire recipe for a mess. Before you even think about touching a single workflow, you need to build a solid foundation. This is the strategic groundwork that makes the difference between a scalable, successful user lifecycle automation in Jira and one that just creates more headaches.
The absolute first move is establishing a single source of truth for all your user identities. This means connecting Jira to your company’s Identity Provider (IdP), whether that’s Okta, Azure AD, or Google Workspace. I can’t stress this enough: for real automation, this isn’t just a suggestion, it’s non-negotiable.
You’ll typically make this connection using a product like Atlassian Guard, which brings System for Cross-domain Identity Management (SCIM) into the picture. SCIM is the engine that will power your automation. It lets your IdP automatically handle creating, updating, and deactivating user accounts across your Atlassian organization.
This integration makes sure your Jira user directory is a perfect mirror of your official company directory, killing discrepancies before they start. Without it, any automation you build is sitting on shaky ground, depending on manual triggers or data that’s all over the place.
Audit and Tidy Up Your User Directory
Once you have your IdP hooked up, it’s time for a deep clean. Over years of use, Jira instances get tangled up in a messy web of user groups and permissions. We’ve all seen it: inconsistent naming conventions, redundant groups, and obsolete roles. These are the little things that will absolutely break your automation rules.
Before you automate anything, do a thorough audit of all your existing user groups. You’re hunting for things like:
- Inconsistent Naming: Groups named “Devs,” “developers,” and “dev-team” that all mean the same thing.
- Redundant Groups: Multiple groups that exist to grant the exact same set of permissions.
- Legacy Roles: Permissions tied to old projects or teams that are long gone.
Your mission is to standardize and simplify. Merge those duplicate groups, set up a clear naming convention (something like department-team-role works wonders), and archive anything you no longer need. This cleanup alone will make your automation logic infinitely simpler and more reliable.
I once consulted for a company where their new hire automation kept failing. The IdP was trying to add people to a group named “Marketing-US,” but the actual group in Jira was “Marketing_USA.” A single underscore was breaking the entire onboarding process. A quick audit would have caught that immediately.
Define Clear Roles and Permission Schemes
With a clean directory in hand, your next job is to define user roles and the permissions they actually need. Stop thinking about individual users. Instead, think in terms of roles: “Software Engineer,” “QA Tester,” “Project Manager,” or “Sales Representative.”
Map out precisely what each role needs to do in Jira. A developer probably needs “Create Issue” and “Edit Issue” permissions in engineering projects, but a sales rep might only need “View” access to the product roadmap. Document these requirements clearly.
This role-based access control (RBAC) model becomes the blueprint for your automation. For example, when a new user is provisioned from your IdP with their “Department” attribute set to “Engineering,” your automation can instantly pop them into the jira-software-engineers group, giving them every permission they need in one go.
To really nail this foundation, it helps to understand broader HR process automation strategies, as they often shape how roles are defined organization-wide. You can also dive into more advanced techniques for specific tasks in our guide on Jira workflow automation. Getting this foundational work right is what ensures your automations are both powerful and predictable from day one.
Alright, let’s get into the nitty-gritty. We’ve talked strategy, but now it’s time to roll up our sleeves and build the actual workflow. This is where the real magic of user lifecycle automation in Jira comes to life, turning what was once a manual, error-prone checklist into a slick, hands-off process.
We’re going to map out the entire journey, from the moment a new hire is created in your HR system to them having the exact access they need on day one.
The whole thing rests on the foundation we talked about earlier: a solid connection between your Identity Provider (IdP) and Jira, usually powered by SCIM. When someone on your HR team adds a new employee in a system like Workday or BambooHR, that profile syncs to your IdP (think Okta or Azure AD). This single action is the first domino to fall.
Thanks to SCIM, your IdP immediately provisions a new Atlassian account for that user. No ticket for IT, no waiting period, and zero chance of a typo in the username. The account exists the instant it’s official, which is a huge first step toward a great day-one experience for any new team member.
The infographic below really brings this to life, showing the core stages of the automated lifecycle—from the initial provisioning to the final deactivation.
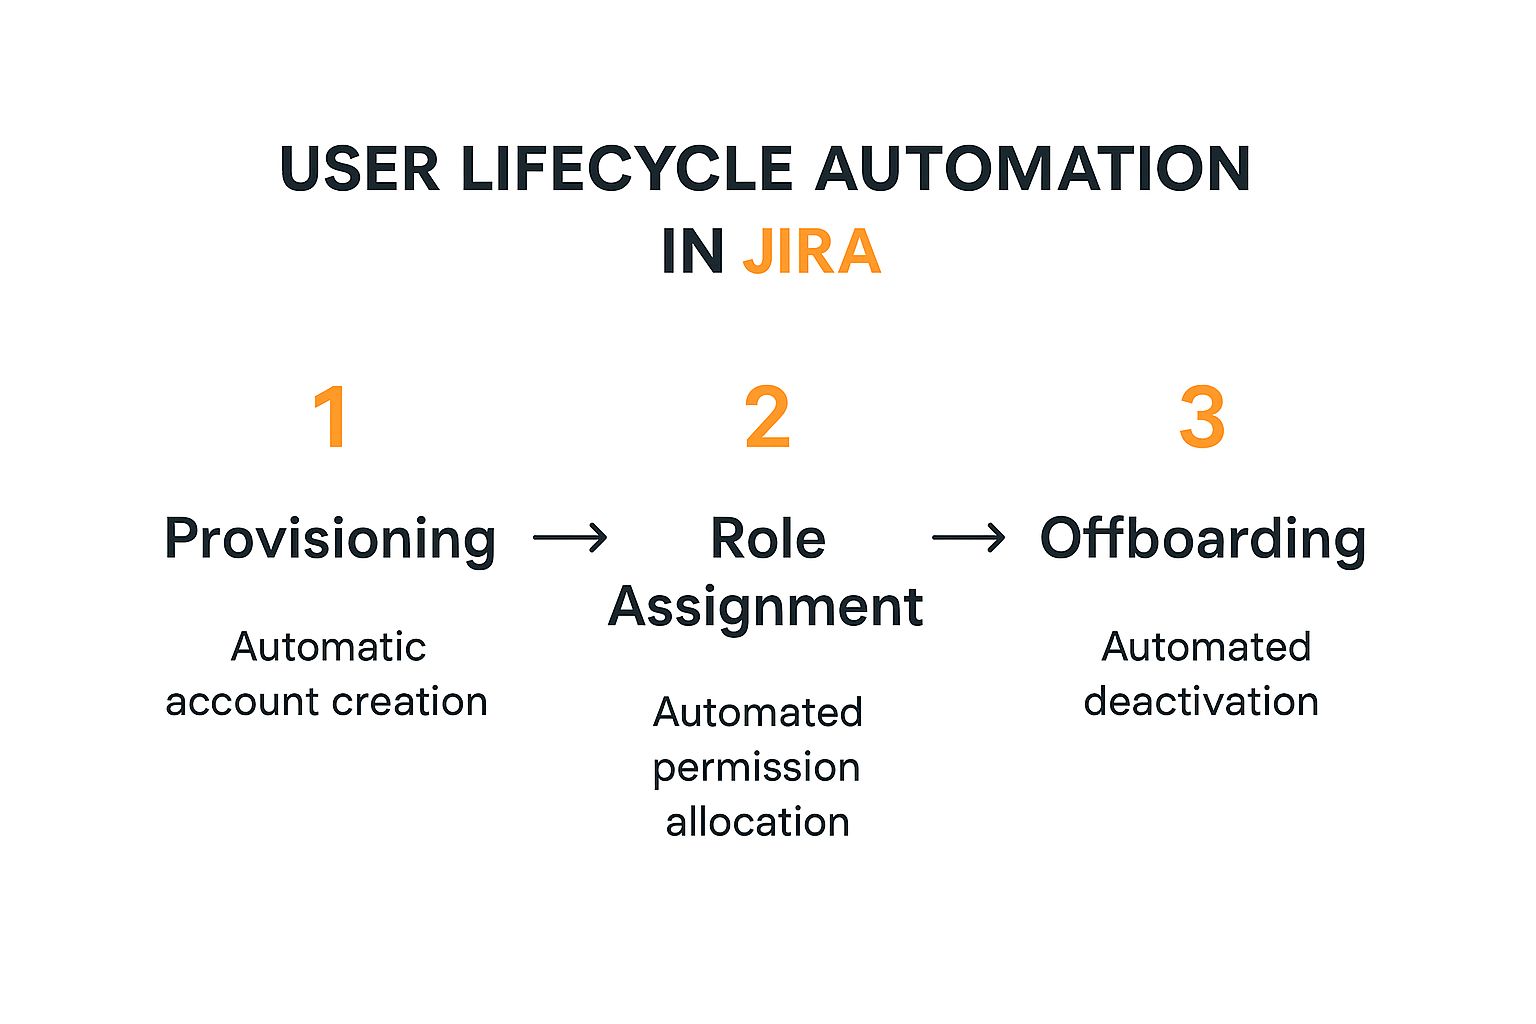
This flow shows how automation can handle the key user events without anyone needing to lift a finger, which keeps everything consistent and secure.
From Account Creation to Role Assignment
An account is a great start, but an account without permissions is pretty useless. This is where Jira Automation rules step up, using the rich data passed from your IdP. When a user account is provisioned, SCIM doesn’t just send a name and email; it sends crucial attributes like department, jobTitle, and officeLocation.
We can build a Jira Automation rule that triggers the moment a new user is created. This rule then reads those IdP attributes to make intelligent decisions.
For instance, you can set up a simple conditional rule:
- IF
user.departmentequals “Engineering” - AND
user.jobTitlecontains “Software Engineer” - THEN add the user to the
jira-software-engineersandconfluence-developersgroups.
Just like that, this single rule grants the new developer access to all the necessary software projects and technical documentation spaces. You can create similar rules for every department—Sales, Marketing, HR, you name it. This approach takes the guesswork out of the equation and makes sure every new hire gets exactly what they need, and nothing more.
A critical piece of advice from my experience: Start with broad, role-based groups first. Fight the urge to create hyper-specific rules for individual projects right out of the gate. A solid foundation based on department-level access is much easier to manage and troubleshoot down the line.
Automating the Onboarding Ticket
System access is only one piece of the onboarding puzzle. New hires also need hardware, welcome packages, and team introductions. Jira Service Management is the perfect tool for orchestrating these real-world tasks, and guess what? We can automate this, too.
Let’s design another automation rule that triggers on new user creation. This time, the action is to create a new ticket in your IT or HR Onboarding service project.
Using smart values, you can make these tickets incredibly detailed and actionable. Here’s a real-world scenario of how that looks:
- Trigger: A new user is created in your Atlassian organization.
- Action: Create an issue in the “HR Onboarding” (HRO) project.
- Ticket Details:
- Summary:
Onboarding for {{user.displayName}} - {{user.jobTitle}} - Assignee: The user’s manager (pulled from an IdP attribute like
managerEmail). - Description: Pre-populate the ticket with a sub-task checklist for all involved teams.
- Summary:
This automation instantly generates a master onboarding ticket assigned to the correct manager. The description can contain sub-tasks like:
[IT] Provision laptop and peripherals[HR] Send company swag and welcome packet[Manager] Schedule team introduction meetings
What was once a chaotic email chain is now a structured, trackable workflow inside Jira. Every stakeholder knows exactly what to do, and nothing falls through the cracks. It’s a powerful way to show how user lifecycle automation in Jira goes beyond just digital permissions.
Pro-Tips for Advanced Onboarding Workflows
Once you’ve got the basics humming along, you can start adding more sophisticated layers. A popular technique I’ve seen work well is creating a personalized Confluence page for each new hire. An automation rule can be set up to create a “Welcome” page under a “New Hires” section in your company’s Confluence space.
This page can be auto-populated with links to important resources, team member profiles, and a personalized welcome message from their manager. It’s a small touch, but it makes a huge difference in making someone feel like part of the team from their very first login.
The power behind these workflows is significant. Recent data shows that Jira automation frameworks can support around 1,700 rule executions per month per user license. This massive capacity is what allows complex onboarding processes, role assignments, and notifications to run smoothly without any manual input, preventing bottlenecks and keeping projects moving.
For those looking to go even deeper, our guide on automating user management in Jira offers more strategies for handling complex situations. By thoughtfully designing these automated steps, you’re not just creating an efficient and secure onboarding experience—you’re creating one that’s welcoming and impressive for every new person who joins your company.
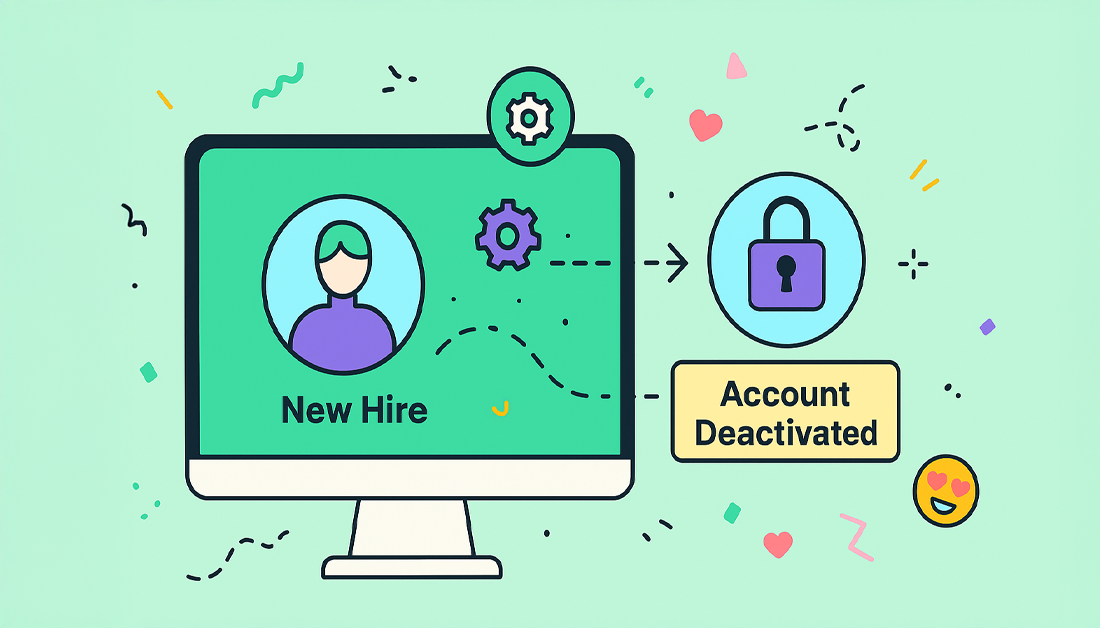
Building a Bulletproof Automated Offboarding Process
A slick onboarding process makes a great first impression. That’s a given. But a sloppy offboarding process? That’s a massive security risk waiting to happen. This is where user lifecycle automation in Jira stops being a “nice-to-have” for efficiency and becomes an absolutely critical security control. One mistake can leave sensitive company data exposed for months. It’s a compliance nightmare.
Our goal is a zero-trust, automated workflow that slams the door shut on human error. It all kicks off the moment an employee’s account is marked for departure in your Identity Provider (IdP). That single trigger in your HR system or IdP is the starting gun for an immediate, precision-timed sequence of events.
The first, most non-negotiable step is the instant deactivation of their Atlassian account. Your IdP sends a deactivation signal via the SCIM protocol, telling your Atlassian organization to suspend the account right now. This one move severs all access to Jira, Confluence, and Bitbucket, effectively locking the door before the real cleanup even begins.
Orchestrating the Cleanup Automation
With access revoked, the next phase is all about scrubbing the user’s digital footprint within Jira. This is where you’ll lean on specific Jira Automation rules to handle the transfer of responsibilities and purge any lingering permissions, ensuring a perfectly clean handoff.
Your top priority should be reassigning their work. You can build an automation rule that listens for the user deactivation event. When it fires, the rule runs a search for all open issues assigned to the departing user and reassigns them—usually to their manager, a designated team lead, or a generic departmental account.
Here’s what that automation logic looks like in practice:
- Trigger: User is deactivated in Jira.
- JQL Search: Execute a search for
assignee = {{account.accountId}} AND status not in (Closed, Done, Resolved). - Action: For every issue the JQL finds, it edits the assignee field to the user’s designated manager or a fallback contact.
This simple rule prevents tasks from falling into a black hole. Projects keep moving, and customer tickets don’t go unanswered. Without this, open issues become orphaned, creating silent blockers that can ripple across multiple teams. For a much deeper dive into the nuts and bolts of this process, check out our detailed guide on how to deactivate Jira users and the cleanup tasks involved.
Purging Permissions and Creating an Audit Trail
After reassigning work, the next mission-critical task is to scrub the user from any project roles or groups they were a part of. While account deactivation blocks their login, removing them from roles is vital housekeeping. It’s a security best practice that also keeps your system clean by preventing their name from popping up in user pickers.
An automation rule can easily iterate through all projects and remove the user from roles like “Administrator,” “Developer,” or “Approver.” This programmatic approach is infinitely more reliable than asking a project admin to remember to do it manually weeks later.
The most crucial part of offboarding automation isn’t just doing the tasks; it’s proving they were done. Creating a final “Offboarding Checklist” ticket is the best way to generate a permanent, auditable record of every single action taken.
This final step brings it all together. The same initial deactivation trigger can create a ticket in a secure IT or HR project, using smart values to detail every automated action performed.
- Summary:
Automated Offboarding for [User Name] - Description:
[✅] Atlassian account deactivated.[✅] Reassigned X open issues to [Manager's Name].[✅] Removed from Y project roles.[❗] Manual review of shared filter ownership needed.
This ticket becomes your immutable proof that a secure, consistent process was followed, ready for any compliance audit. The table below breaks down these essential actions and why they are non-negotiable for a truly secure offboarding workflow.
Essential Offboarding Automation Actions
This table provides a quick checklist of the critical actions every automated Jira user offboarding workflow should include.
| Action | Why It’s Critical | Recommended Automation Method |
|---|---|---|
| Account Deactivation | Immediately revokes all access to prevent unauthorized entry and data exposure. | SCIM provisioning from your Identity Provider (IdP). |
| Issue Reassignment | Ensures business continuity by preventing tasks and tickets from being orphaned. | Jira Automation rule triggered by user deactivation. |
| Role & Group Removal | Eliminates lingering permissions and cleans up project configurations for better security. | Jira Automation rule or a dedicated app script. |
| Audit Log Creation | Provides a clear, time-stamped record of all offboarding actions for compliance. | Jira Automation creating a final “checklist” ticket. |
By meticulously building out this automated offboarding process, you transform a high-risk manual chore into a dependable, secure system. This gives you peace of mind, knowing that the moment an employee departs, your organization’s data and systems are immediately protected.
Mastering Advanced Automation and Maintenance

Okay, you’ve handled the core onboarding and offboarding workflows. That alone probably freed up a good chunk of your week by getting rid of the biggest manual headaches. The built-in automation engine is a beast, but now it’s time to think beyond just arrivals and departures.
We need to talk about the “in-between” moments of the employee journey—the promotions, department shuffles, and project changes. These internal moves are a huge blind spot in many automation strategies. When a developer becomes a team lead or a marketer shifts from content to product, their access needs change on a dime. True user lifecycle automation in Jira manages these transitions just as smoothly as day one.
Automating Internal User Changes
The secret to handling internal moves is sticking to the same principle we used for onboarding: your Identity Provider (IdP) is the absolute source of truth. When an employee’s jobTitle or department attribute gets updated in your HR system, that change needs to flow directly through your IdP and into Jira.
From there, you can build automation rules that are always listening for these specific attribute changes. Let’s say a user’s title is updated from “Software Engineer” to “Engineering Manager.”
- Trigger: A webhook fires from your IdP, signaling a user profile update.
- Condition: The automation checks if the user’s
jobTitleattribute has changed. - Action: A series of
if/elseblocks gets to work.- If the new title is “Engineering Manager,” the rule adds them to the
jira-engineering-managersgroup and, just as importantly, removes them from thejira-software-engineersgroup. - This instantly grants them new permissions, like project admin rights or access to leadership dashboards, while revoking the permissions they no longer need.
- If the new title is “Engineering Manager,” the rule adds them to the
This dynamic approach means users always have the correct level of access. It’s a massive win for minimizing security risks and finally killing the endless stream of manual permission update tickets.
The Rise of AI in Automation Management
As your automation rules get more sophisticated, managing them can start to feel like a full-time job. This is where modern AI features are really starting to shine. AI-powered assistants are becoming a game-changer for admins, using natural language processing (NLP) to translate plain English commands into functional rules.
Early adopters have reported cutting down the time spent on routine tasks by up to 30%, simply by reducing all the manual clicking. Instead of building a rule step-by-step, you could just type, “When a user’s department changes to Sales, add them to the Sales Project role and remove them from all others.” The AI can draft the rule for you to review and approve. This not only makes you faster but also lowers the barrier to entry for other team members who might not be as deep in the weeds of automation logic.
Long-Term Success Through Maintenance and Documentation
Building a brilliant automation system is one thing. Keeping it reliable and scalable as your company grows is another challenge entirely. From my experience, long-term success comes down to three habits that are too often overlooked: auditing, failure notifications, and documentation.
An automation rule that works perfectly today can fail silently tomorrow due to a small change in a custom field or project permission scheme. Without active monitoring, you won’t know it’s broken until it causes a real problem.
Get a recurring audit on your calendar. Go through your automation rules, check the logs for failures, and sanity-check the logic to make sure it still aligns with how your teams actually work.
Essential Maintenance Habits:
- Configure Failure Notifications: Every single automation rule needs a failure notification. Set it up to ping a specific admin or a shared IT channel in Slack or Microsoft Teams. This is how you fix problems before they ever impact a user.
- Document Everything: Create a dedicated Confluence page for your user lifecycle automations. For each rule, write down its purpose, trigger, actions, and the business process it supports. This “runbook” becomes invaluable for troubleshooting and for getting new admins up to speed.
- Regularly Purge Inactive Users: Even with perfect automation, periodic cleanups are non-negotiable for optimizing licenses and tightening security. For a structured approach, our comprehensive guide for the User Deactivator app gives you actionable steps to keep your Jira instance lean and mean.
By pairing advanced workflows with disciplined maintenance, you’re not just building a system that works today—you’re building one that will adapt and scale with your organization for years to come.
Frequently Asked Questions
Even the best-laid automation plans can hit a few snags in the real world. Let’s walk through some of the most common questions and roadblocks Atlassian admins run into when they’re getting user lifecycle automation in Jira off the ground. My goal here is to give you direct, practical answers to get you past these hurdles quickly.
What Happens If an Automation Rule Fails During Offboarding?
This is a big one, and for good reason—a failed offboarding rule can punch a serious hole in your security. Your most important line of defense here is proactive monitoring. The first thing you should do is set up failure notifications for every single automation rule in your offboarding process.
Make sure these alerts go straight to an IT admin channel in Slack or a dedicated email group. That way, if a rule breaks—maybe an API times out or someone changes a project permission scheme without telling you—your team knows immediately and can jump in to handle it manually. This blend of automated attempts and human oversight creates a solid safety net.
I can tell you from experience, the most common failure point I see is when an automation tries to reassign issues to a manager who isn’t specified in the Identity Provider (IdP). Always build a fallback into your rule, like assigning the issues to a generic “unassigned” user or a departmental service account.
Can I Automate Permissions for Temporary Contractors?
Absolutely, and you definitely should. Managing temp access is a perfect job for automation. The cleanest way to do this is by using user groups in your IdP that have built-in expiration dates.
For instance, you could create a group called Contractors-ProjectX and set it to automatically expire after 90 days. When you add a contractor, SCIM provisions their account in Jira, and your rules can automatically add them to a corresponding jira-contractors group. Once the 90 days are up, the IdP yanks them from the group, which in turn triggers your automated offboarding workflow. It’s a “set it and forget it” approach that ensures temporary access doesn’t accidentally become permanent.
How Do I Handle Reassigning Issues Without a Manager?
This comes up all the time, especially in flatter organizations or when HR data just isn’t complete. The key is to have a clear default path. The most reliable solution is to set up a “catch-all” or fallback user for each department.
You could create a generic user account like engineering-unassigned, for example. Then, structure your automation rule’s logic to handle this gracefully:
- First, try to reassign all open issues to the user’s
managerattribute pulled from the IdP. - If the
managerfield is empty, then reassign the issues to that department’s fallback user (e.g.,engineering-unassigned). - Finally, have the rule post a comment on the main offboarding ticket, flagging that the issues went to the fallback user and need manual triage.
This tiered logic makes sure no issue ever gets left in limbo, even if the primary person isn’t available. It keeps the work moving while letting the team know a manual follow-up is needed.
Is Atlassian Guard Required for User Lifecycle Automation?
You can cobble together some basic automation without it, but honestly, Atlassian Guard is highly recommended for any serious, enterprise-grade user lifecycle automation. Guard is what provides the SCIM capabilities that let your IdP (like Okta or Azure AD) automatically create and remove users in your Atlassian organization.
Without Guard, you’re stuck relying on custom scripts, clunky API calls, or triggers that are far less reliable. Guard smooths out the whole process. Think of it as the foundational bridge connecting your central user directory to Jira, ensuring all your automation is built on a stable, secure, and officially supported connection.
Managing inactive users is a core part of any lifecycle strategy. resolution Reichert Network Solutions offers User Deactivator, an app that automates the cleanup of inactive accounts to optimize your license costs and tighten security. Explore how you can automate your user directory maintenance.
