
An escalation matrix template is basically a pre-built roadmap that shows you exactly how to handle problems that your frontline team can’t solve. It’s all about getting the right issue to the right person at the right time, without any guesswork.
Think of it as your company’s emergency response plan for when things go sideways. It’s designed to bring order to chaos and stop small headaches from snowballing into full-blown crises.
Why Your Team Needs an Escalation Matrix
Let’s be honest—when a mission-critical system goes down or a VIP customer is fuming, the absolute last thing you need is a chaotic scramble to figure out who’s supposed to deal with it. This is where an escalation matrix becomes the secret weapon for high-performing teams. It provides a crystal-clear, structured path to get things resolved. It’s not just some bit of corporate jargon; it’s a practical tool that helps you stay in control when the pressure is on.
A well-thought-out matrix makes sure that issues are tackled by people with the right skills and the authority to make a call. This keeps your senior leaders from getting swamped with minor problems, but ensures they get pulled in immediately when something major happens. This structured approach isn’t exactly new—it has its roots in frameworks like ITIL and has become pretty standard practice. In fact, by 2023, an estimated 85% of mid to large organizations had formally adopted some kind of escalation matrix to manage their incidents and support requests.
You can learn more about how to set up an effective escalation process in our detailed guide: https://www.resolution.de/post/issue-escalation-process/
The Core Benefits of Using a Matrix
Beyond just putting out fires faster, a solid escalation matrix brings some serious advantages to any team, whether you’re in IT, customer service, or project management.
- Clarity and Accountability: It completely wipes out confusion. Everyone knows exactly who owns an issue at every single stage.
- Faster Resolution Times: By automatically pointing issues to the correct person, you dramatically cut down the time spent just waiting for someone to respond.
- Improved Customer Satisfaction: When customers get quick, effective support, it builds a massive amount of trust and loyalty.
- Empowered Frontline Teams: Your staff knows precisely when and how to ask for help. This empowers them to handle what they can and confidently escalate what they can’t.
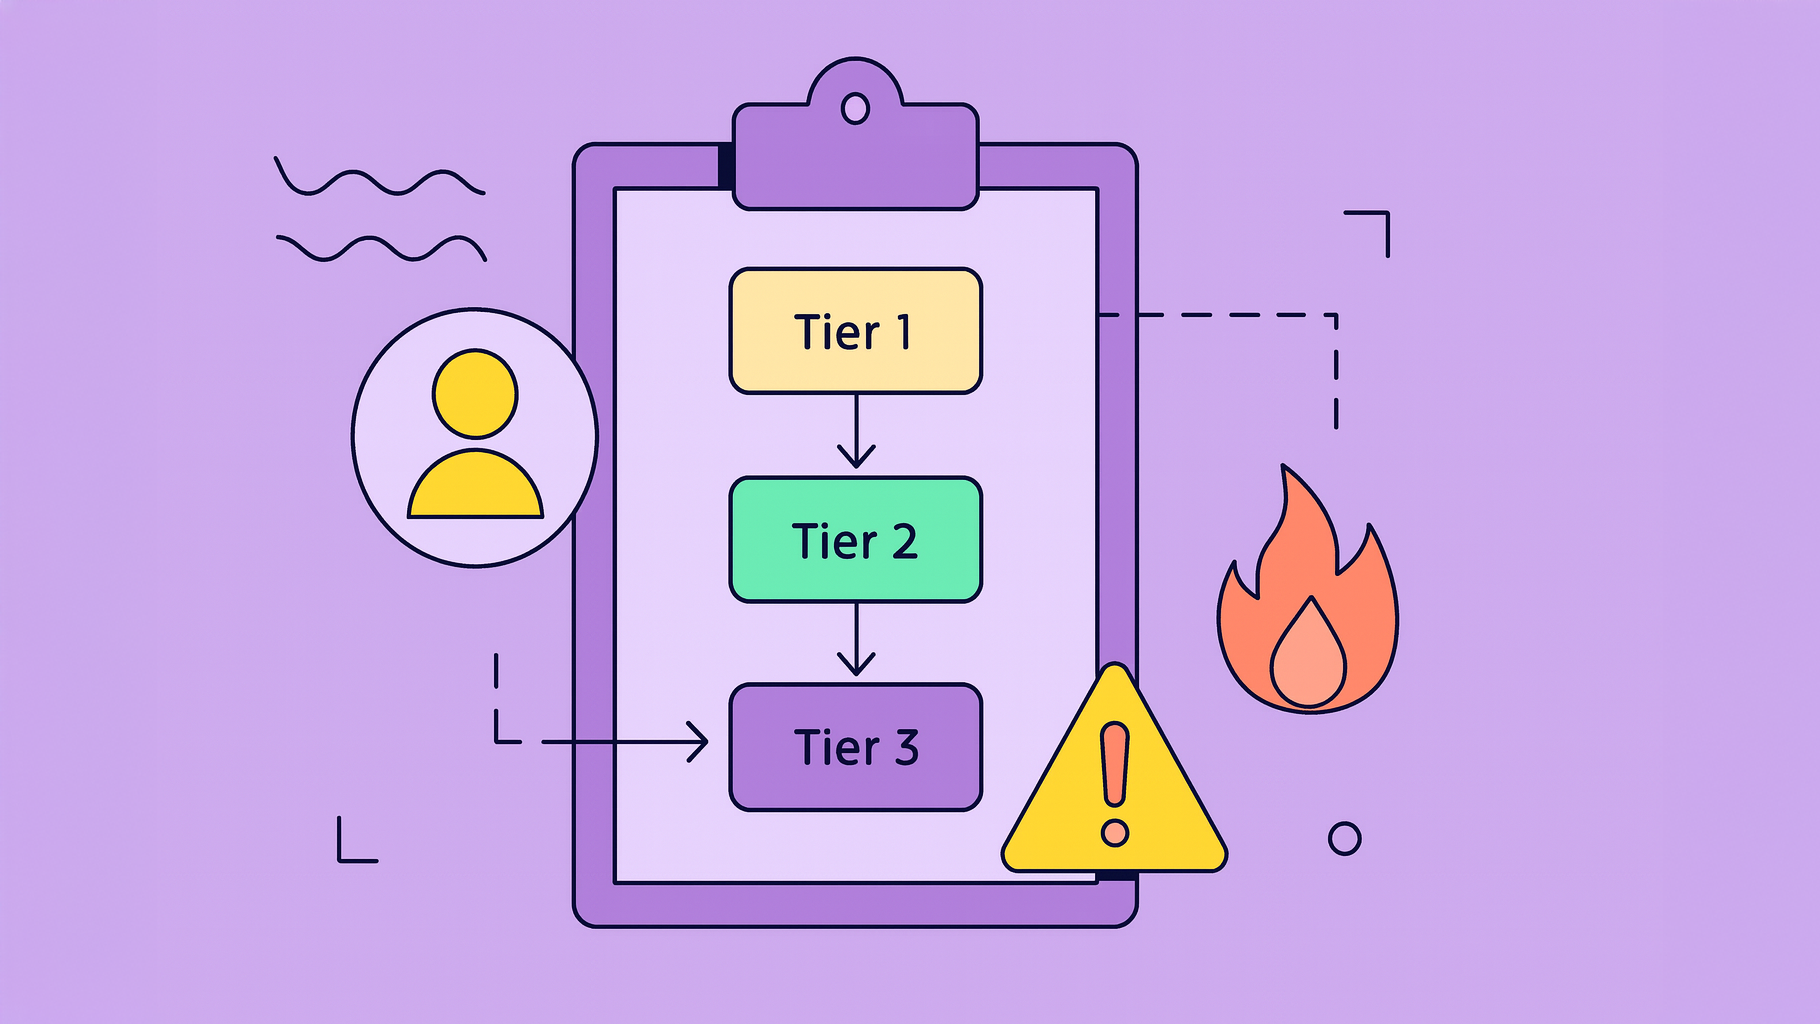
The main goal here is to create a visual guide that anyone can look at and understand, even when they’re under pressure. For instance, here’s an example of how you can map different issue severities to specific teams and timelines.

This kind of visual layout makes the chain of command instantly clear, making the whole process feel intuitive for everyone involved. The real magic is how the matrix connects the severity of a problem directly to a pre-assigned response team and a specific timeline. It’s this simple structure that can transform a chaotic situation into a process that feels completely under control.
Laying the Groundwork for a Flawless Escalation Plan

Before you even think about downloading an escalation matrix template, we need to talk about the foundation. It’s just like building a house—if you skimp on the foundation, the whole thing will eventually come crashing down. This prep work isn’t just about ticking boxes; it’s the strategic core that will make or break your entire escalation process.
The absolute first thing you have to do is get everyone on the same page about what an “issue” actually means. It sounds deceptively simple, but I’ve seen more escalation plans fall apart over this one point than any other.
Is a slow-loading webpage a minor hiccup or a revenue-crushing emergency? The answer depends entirely on your business, but what’s crucial is that your team has a single, unified answer. This one step eliminates the guesswork and gets everyone from your frontline support agents to the CTO speaking the same language. Without it, you’ll see small problems escalated into a full-blown panic while truly critical incidents are dangerously overlooked.
Defining Your Severity Levels
Once you’ve settled on what an issue is, it’s time to classify them. This is where you hammer out clear, objective definitions for different levels of impact. Most organizations find a four-tier system does the trick, but you can always tweak it to what makes sense for you. The goal here is a shared understanding of urgency.
A fantastic way to nail this down is to walk through real-world scenarios for each department.
- Critical (P1): These are the “all hands on deck” emergencies. Think a total website outage for an e-commerce store during a Black Friday sale or a data breach that exposes customer information. The impact is immediate, widespread, and catastrophic to the business.
- High (P2): These are serious problems that cause major disruption but aren’t quite a full-blown catastrophe. A good example would be a key feature in your software breaking for a large chunk of your users, or the main payment processor failing intermittently.
- Medium (P3): These issues have a moderate impact or only affect a smaller group of users. This could be a bug in a nice-to-have feature or a server that’s sluggish but still up and running. The user experience is definitely degraded, but core services are still working.
- Low (P4): We’re talking minor stuff here—cosmetic bugs, typos, or things with an obvious workaround. A typo on a landing page, a UI element that’s a few pixels off, or a feature request from one person would land here.
By defining these levels with concrete, relatable examples, you give your team the power to assess situations accurately and kick off the right response without a moment’s hesitation. This foundational work aligns perfectly with many service desk best practices that champion clarity and efficiency above all else.
Assembling Your A-Team and Defining Their Roles
An escalation matrix template is only as solid as the people you task with executing it. You can define the what all day long, but the process falls apart without the who. The next critical move is assigning the dedicated individuals responsible for tackling problems at each level of your matrix.
This isn’t just about plugging names into a chart. It’s about building a reliable human network that knows exactly what to do when things go sideways. This “A-Team” is your designated chain of command, and there can’t be any gray areas when an issue gets handed off.
Think of it like this: your frontline support is the first line of defense, empowered to handle the common, everyday problems. But when they hit a wall, the issue has to go somewhere. That’s when it escalates to a team lead or a senior specialist with deeper expertise. If the problem still isn’t solved, it moves up again—this time to a department head or an on-call engineer with the authority to pull in more resources. For the real code-red emergencies, that line goes straight to the top.
Clarifying Responsibilities at Every Level
Simply naming a point person for each tier isn’t going to cut it. You need crystal-clear responsibilities to prevent process breakdowns and finger-pointing. For every role in your escalation path, you have to explicitly define their duties and, just as importantly, their decision-making power.
- Frontline Support (Tier 1): Their primary job is to gather information, try to find a fix using known solutions, and document the issue accurately. Crucially, they need the authority to escalate when a problem is clearly outside their scope.
- Specialists/Team Leads (Tier 2): These are your deep divers. They’re responsible for in-depth troubleshooting and investigation. They should have the power to make tactical decisions, like approving a specific patch or deploying a hotfix.
- Management/Engineers (Tier 3): This tier is for the big, systemic, high-impact problems. Their responsibilities include coordinating responses across different departments, communicating with key stakeholders, and signing off on major changes or unexpected costs.
This kind of structured approach creates a clear hierarchy, which you can see visualized below.
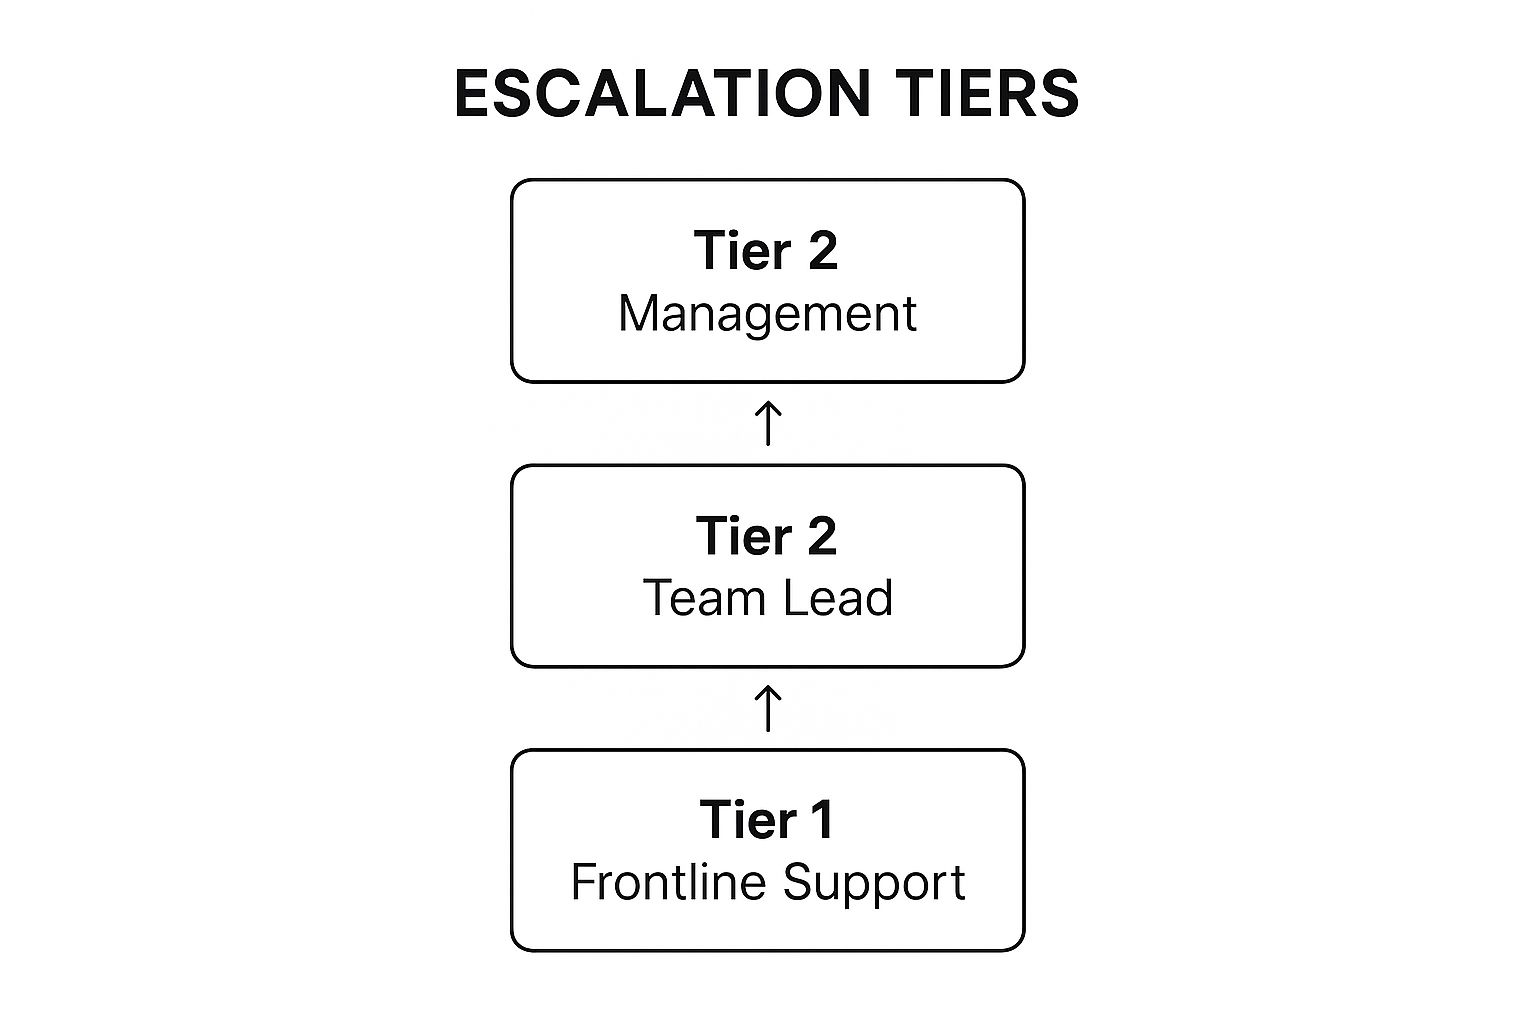
The visualization shows a straightforward path, making sure that issues flow logically from initial support right up to higher-level management without getting stuck in limbo.
A critical, but surprisingly common, oversight is failing to name backup contacts. People get sick. People go on vacation. Your process can’t. Naming a secondary and even a tertiary contact for each role is what makes your escalation process truly resilient 24/7.
To give you a more concrete idea of how this looks in practice, here’s a typical breakdown of roles and responsibilities in a 4-tier system.
Sample Role & Responsibility Breakdown
| Level | Primary Contact (Role) | Key Responsibilities | Backup Contact |
|---|---|---|---|
| Level 1 | Customer Support Agent | Initial diagnosis, data gathering, resolving known issues, logging tickets. | Shift Supervisor |
| Level 2 | Senior Support Specialist | In-depth troubleshooting, root cause analysis, non-standard fixes. | Team Lead |
| Level 3 | Engineering Lead/On-Call Dev | Code-level investigation, bug fixes, system-wide issue coordination. | Department Manager |
| Level 4 | Head of Engineering/CTO | Major incident command, strategic decisions, cross-departmental resource allocation. | COO |
This table is just a starting point, of course. You’ll need to adapt it to your own team structure and the specific skills of your people.
The complexity of these roles often depends on your company’s size and industry. For instance, research shows that about 40% of small companies use simpler matrices where frontline agents escalate directly to a department head for faster decision-making. On the other hand, large IT organizations need incredibly detailed matrices with multiple tiers spanning support, engineering, and DevOps.
If you’re managing this across different platforms, integrating your tools is a game-changer. For a practical example, check out our guide on how to handle HubSpot to Jira ticket escalation to see how it works.
Setting Response Times That Actually Make Sense

In incident management, time isn’t just a factor; it’s the whole ballgame. A vague promise to handle issues “ASAP” is the equivalent of crossing your fingers and hoping for the best. It’s not a strategy—it’s a surefire way to get frustrated customers and burned-out support teams.
This is where your escalation matrix gets its teeth. You need to pin down concrete Service Level Agreements (SLAs) for two critical metrics: response time (how fast you acknowledge the problem) and resolution time (how fast you fix it). These aren’t just internal benchmarks; they’re promises.
Matching Timelines to Tiers and Trouble
A one-size-fits-all SLA is destined to fail. A minor UI glitch on a forgotten settings page doesn’t demand the same all-hands-on-deck panic as a full system outage that’s bleeding cash by the minute. Your timelines have to be tied directly to the severity levels you’ve already defined.
Let’s walk through a real-world example:
- Critical (P1) Issues: These are the “drop everything” moments. The clock is ticking, and it’s loud. Your SLA has to mirror that urgency.
- Initial Response (Tier 1): Under 15 minutes. This is about acknowledging the fire and grabbing the nearest extinguisher.
- Escalation to Tier 2: Within 30 minutes. If the first person on the scene can’t put it out, it needs to be in an expert’s hands immediately.
- Target Resolution: Under 4 hours. This is the goal to get services back up and running.
- Medium (P3) Issues: These are painful but not business-halting. Users are definitely feeling it, but the whole operation isn’t grinding to a stop.
- Initial Response (Tier 1): Within 4 business hours. Acknowledge it, log it properly, and get it in the queue.
- Target Resolution: Within 3-5 business days. This gives the team space for proper troubleshooting without pulling everyone off more critical incidents.
This tiered approach is all about smart resource allocation. It prevents your top engineers from getting bogged down with low-priority tickets while guaranteeing that major meltdowns get the rapid-fire attention they demand.
An SLA isn’t just a number on a spreadsheet; it’s a commitment. It aligns your team’s efforts with the promises you’ve made to customers, building a bedrock of accountability and trust.
Keeping an Eye on the Clock
Setting these timers is only half the battle. You have to actually watch the clock. Without proper tracking, your beautifully crafted SLAs are nothing more than hopeful suggestions.
It’s non-negotiable: integrate these timers directly into your helpdesk or project management software. Doing this creates automatic alerts when an SLA is about to be breached, giving your teams a chance to react before a promise is broken. This is a fundamental part of any healthy service organization.
For anyone looking to go deeper on this, there’s a wealth of information out there on effective service level agreement monitoring and the best practices that make it work.
Bringing Your Escalation Matrix to Life
An amazing plan on paper is completely worthless until you put it into action. Your perfectly crafted escalation matrix template is no different. So, let’s talk about how to roll out this new process across your organization, turning a document into a living, breathing part of your daily workflow.
The rollout really kicks off with communication. You need to make sure everyone—from the newest hire on the support desk to the most senior executive—understands the process and exactly what their role is. Don’t just fire off an email with a link and cross your fingers. Take the time to hold brief training sessions and walk people through it.
Make It Accessible and Unavoidable
For an escalation matrix to actually work under pressure, it needs to be ridiculously easy to find. During a real incident, every second counts. Nobody has time to go digging through forgotten folders on a shared drive.
Your goal is to make it visible and accessible within the tools your team already uses every single day.
Consider these prime locations:
- Your Company Wiki: A dedicated page on Confluence or Notion is a classic choice. It’s a central source of truth for a reason.
- A Pinned Channel: Pin the matrix in your main incidents channel on Slack or Microsoft Teams. That way, it’s always just one click away.
- Integrated into Your Helpdesk: This is often the best-case scenario. Building the logic directly into your service desk software like Jira Service Management or Zendesk can automate escalations based on the SLAs you’ve already set.
A great escalation matrix is never truly “finished.” Think of it as a living document that should evolve right alongside your team and business. The initial rollout is just the start of an ongoing cycle of improvement.
Create a Culture of Continuous Improvement
Once your matrix is live, your job shifts from creation to curation. It’s absolutely critical to build a feedback loop that lets the process get better based on what happens in the real world.
After every significant incident, hold a short debrief. Ask the tough questions: Did the matrix work as expected? Were there any bottlenecks? Was anyone impossible to reach?
This feedback is gold. Use it to make small, iterative updates. Maybe a contact person has changed roles, or you discover that a P2 response time is just too slow for a specific kind of issue. Regular reviews—I’d suggest at least quarterly, and always after a major event—are what keep the process sharp and effective.
This philosophy of constant refinement is really a cornerstone of operational excellence. You can learn more about building this kind of resilient system by exploring proven incident management best practices that emphasize learning from every single event. By treating your escalation matrix as a dynamic tool rather than a static chart on a wall, you ensure it remains a powerful asset for keeping chaos at bay.
Got Questions About Your Escalation Matrix?
Even with the best-laid plans and a solid template, questions always come up. Let’s be real—turning theory into practice is where the rubber meets the road, and that’s where you find the tricky spots. We’ve pulled together the most common questions we get asked, straight from the trenches.
Think of this as your field guide for getting it right. These aren’t theoretical problems; they’re the practical hurdles teams face after the initial setup. Nailing these down is what makes your matrix a reliable tool when the pressure is on, not just a document that gathers digital dust.
How Often Should We Really Be Updating Our Escalation Matrix?
This is a big one, and the honest answer is probably more often than you think. A “set it and forget it” mindset is a recipe for absolute chaos. People switch roles, get new phone numbers, and teams get shuffled around. An outdated matrix isn’t just unhelpful; it’s a liability.
A good rule of thumb is to put a formal review on the calendar at least once a quarter. This simple cadence keeps the information fresh and the process relevant. But there are a couple of other times when an update is non-negotiable:
- Right after a major incident: A real crisis is the ultimate stress test for your process. Your post-mortem should always include a hard look at the matrix. Did it work? Were there bottlenecks or dead ends? Use those fresh learnings to patch the holes immediately.
- Anytime the team structure changes: When teams are reorganized or key people move on, your first stop should be the escalation matrix. Update the chain of command before you do anything else.
The single biggest mistake is treating the matrix as a static document. It’s a living part of your operational toolkit. An outdated contact number during a crisis can derail your entire response.
What’s the Number One Mistake People Make?
Having seen countless matrices over the years, I can tell you the most common pitfall is, without a doubt, over-complicating things. It’s so tempting to build a labyrinthine chart that tries to account for every conceivable edge case. Please, don’t do it.
A convoluted matrix with a dozen levels, fuzzy ownership, or confusing “if-then” logic becomes a roadblock, not an accelerator. When an incident is unfolding, your team needs crystal clarity and speed. They need to glance at the document and know exactly who to call, right now. If they have to spend five minutes trying to interpret a flowchart, you’ve already lost precious time.
The goal is to keep it as lean as possible while covering your most critical bases. Every single level, role, and instruction must have a clear, justifiable purpose. If you can’t explain why a step is there in a single sentence, it’s a good sign it’s too complicated.
Where Is the Best Place to Keep Our Escalation Matrix?
Accessibility is everything. Your beautifully simple, perfectly updated matrix is completely worthless if nobody can find it when the sirens are blaring. Burying it five folders deep in a shared drive is a classic rookie mistake.
You need to put it in a centralized, high-visibility spot that everyone on the team can get to without thinking. It should be muscle memory. Consider the tools your team already lives and breathes in every day.
- A pinned page in your internal wiki, like Confluence or Notion.
- A pinned post in a dedicated incidents channel on Slack or Teams.
- Built directly into your helpdesk or incident management platform.
The main objective is to eliminate friction. The path to finding the matrix should be so obvious that it requires zero brainpower during a high-stress emergency.
Ready to stop building processes from scratch and start unifying your work? resolution Reichert Network Solutions GmbH offers monday.com for Jira, an app that seamlessly bridges your project planning and issue tracking. Embed monday.com boards directly in Jira, sync updates in real time, and give your cross-functional teams the visibility they need to resolve issues faster. Learn how to optimize your workflows and connect your tools today.
